Object Storage to CtrlB
This guide explains how to configure AWS, GCP, and Azure object storage in CtrlB for ingesting historical data and streaming live events.
1. Backfill Blob Uploader
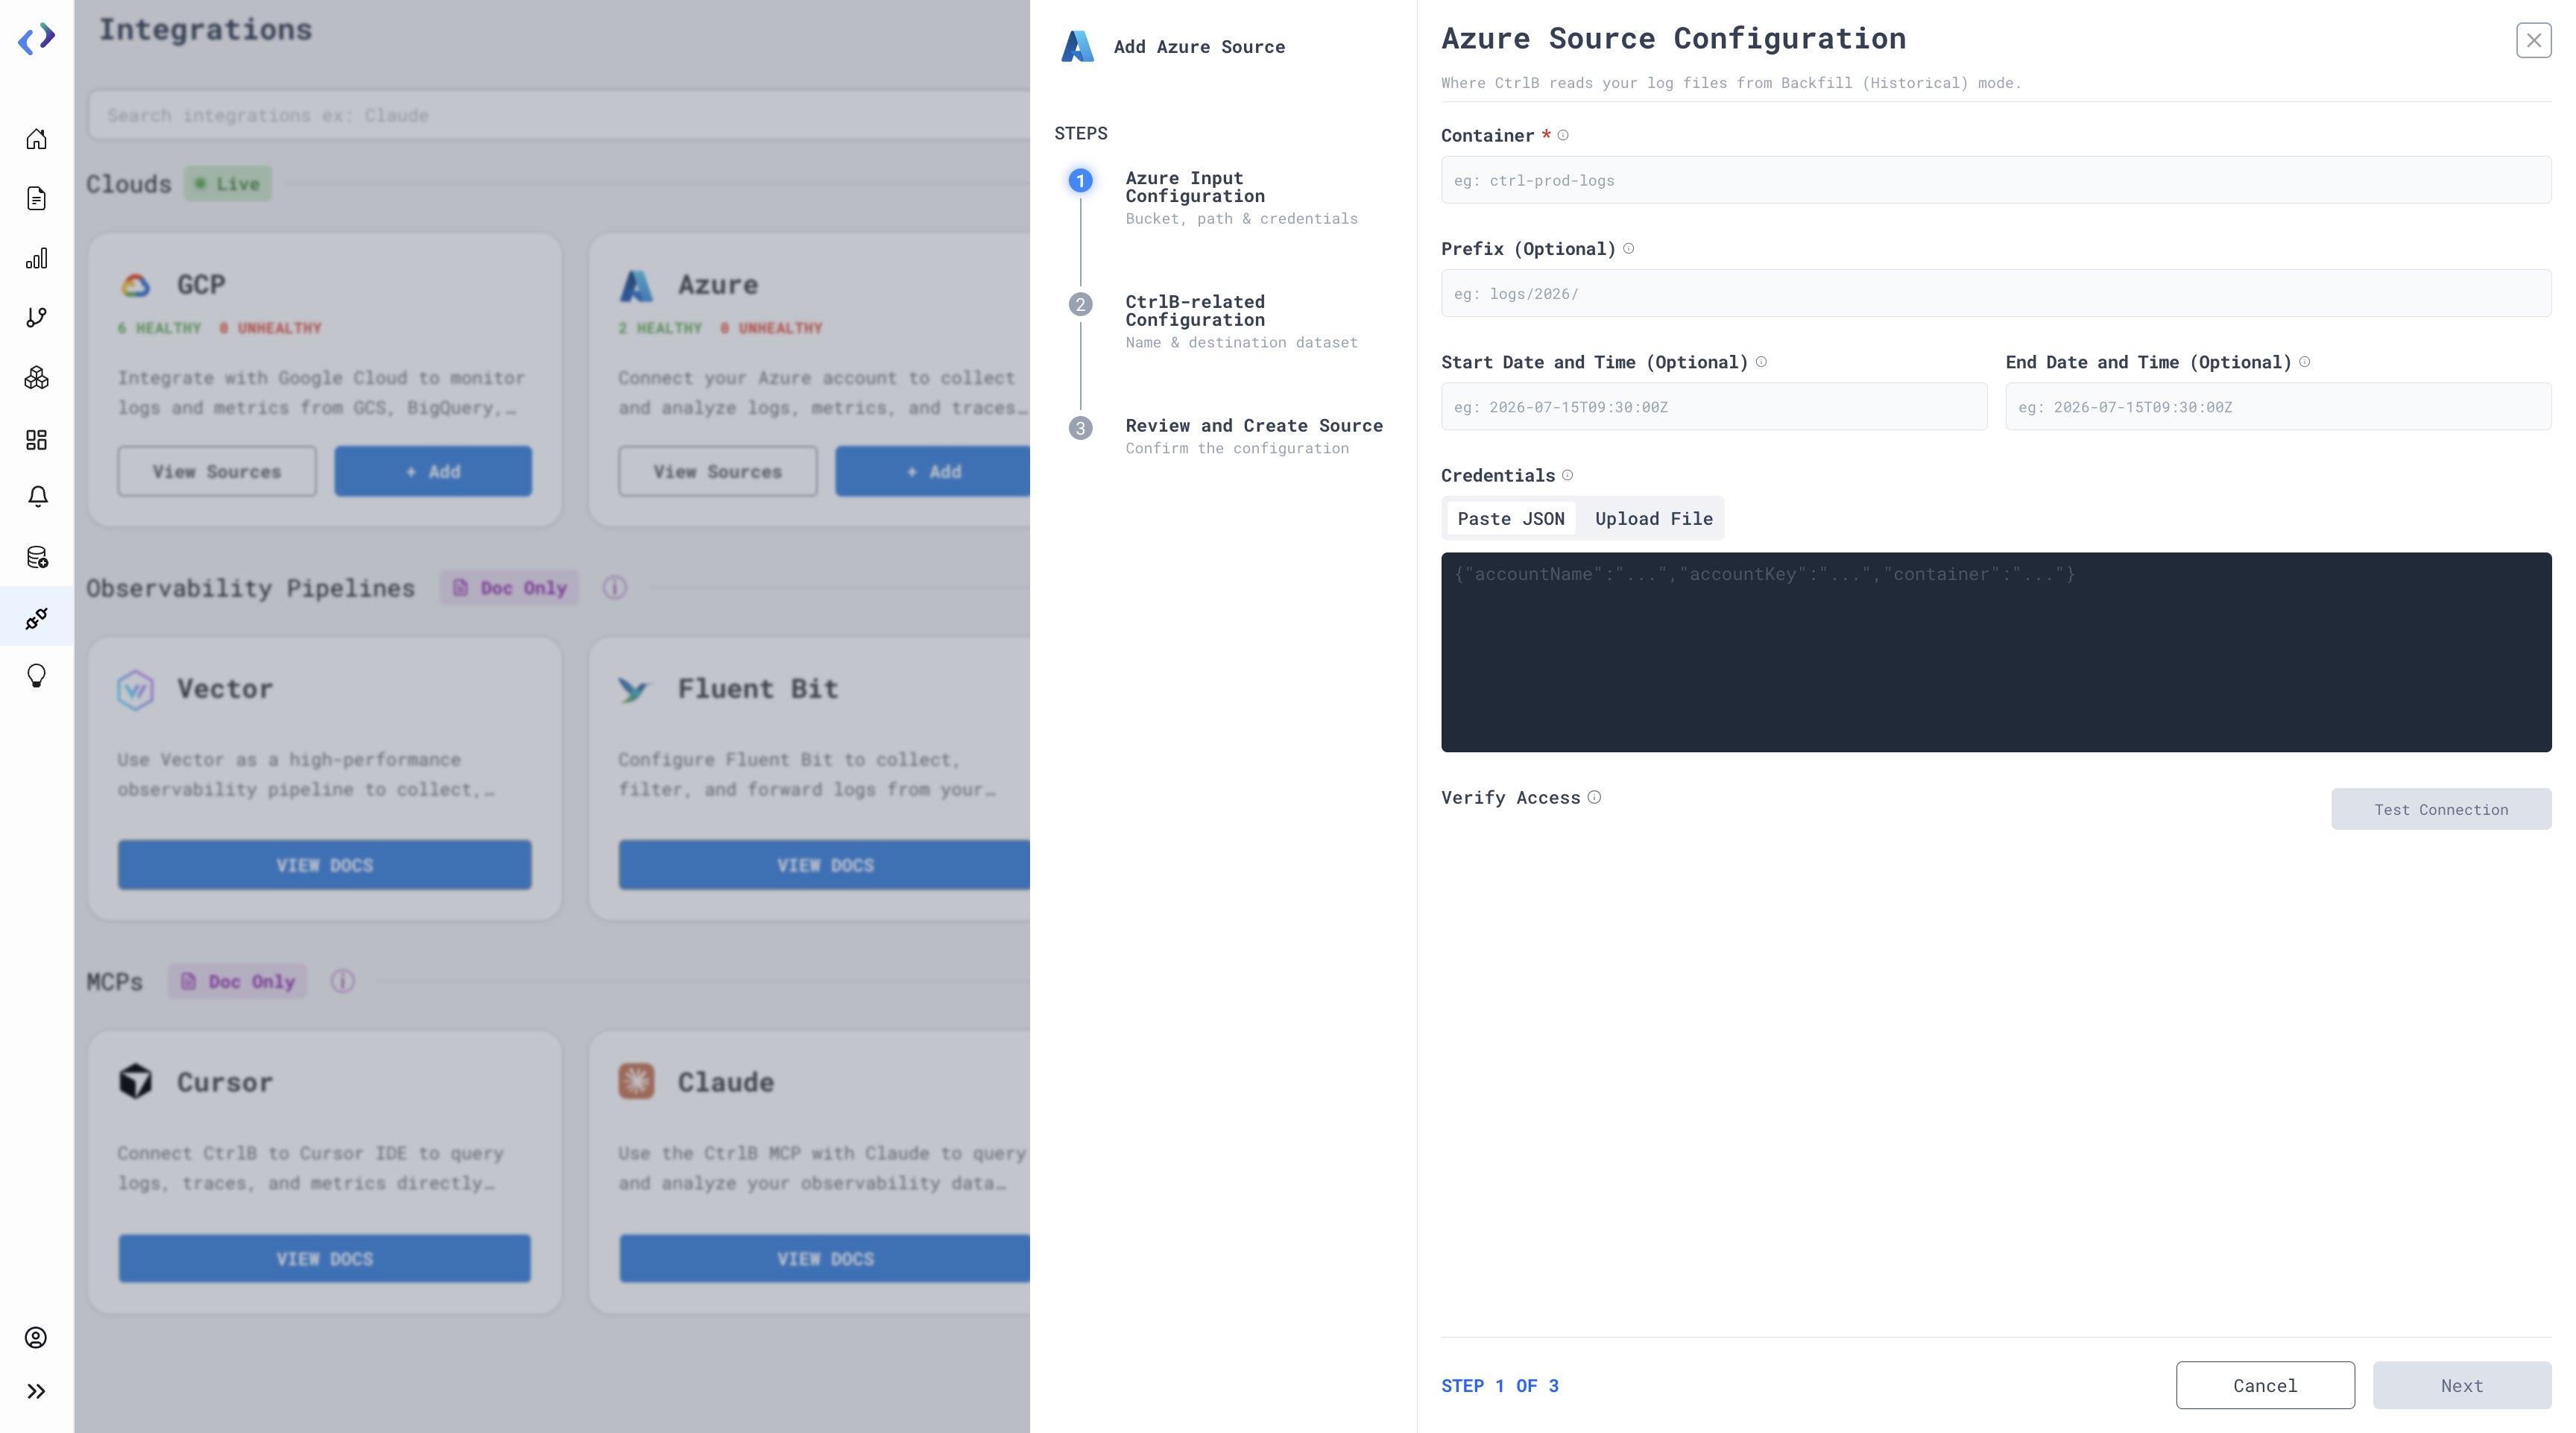
Backfill (Historical) mode allows users to ingest existing files from cloud storage into CtrlB for a specified time range. It is supported for AWS, GCP, and Azure sources.
How to Use It:
- Go to the Integrations page.
- Under Clouds, select AWS, GCP, or Azure and click Add.
- For AWS and GCP, enter the Bucket name. For Azure, enter the Container name.
- Enter an optional Prefix to limit the files to a specific path.
- Enter the optional Start Date and Time and End Date and Time for the historical data to ingest.
- Provide the required cloud credentials by either pasting the JSON or uploading a credentials file.
- Click Test Connection to verify access. If the connection test fails, correct the credentials before proceeding to the next step.
- Click Next.
- Enter a Source Display Name and select the destination Dataset.
- Click Next.
- Review the source and CtrlB-related configuration.
- Click Create Source to start the backfill.
Availability:
Available for users with permission to configure integrations.
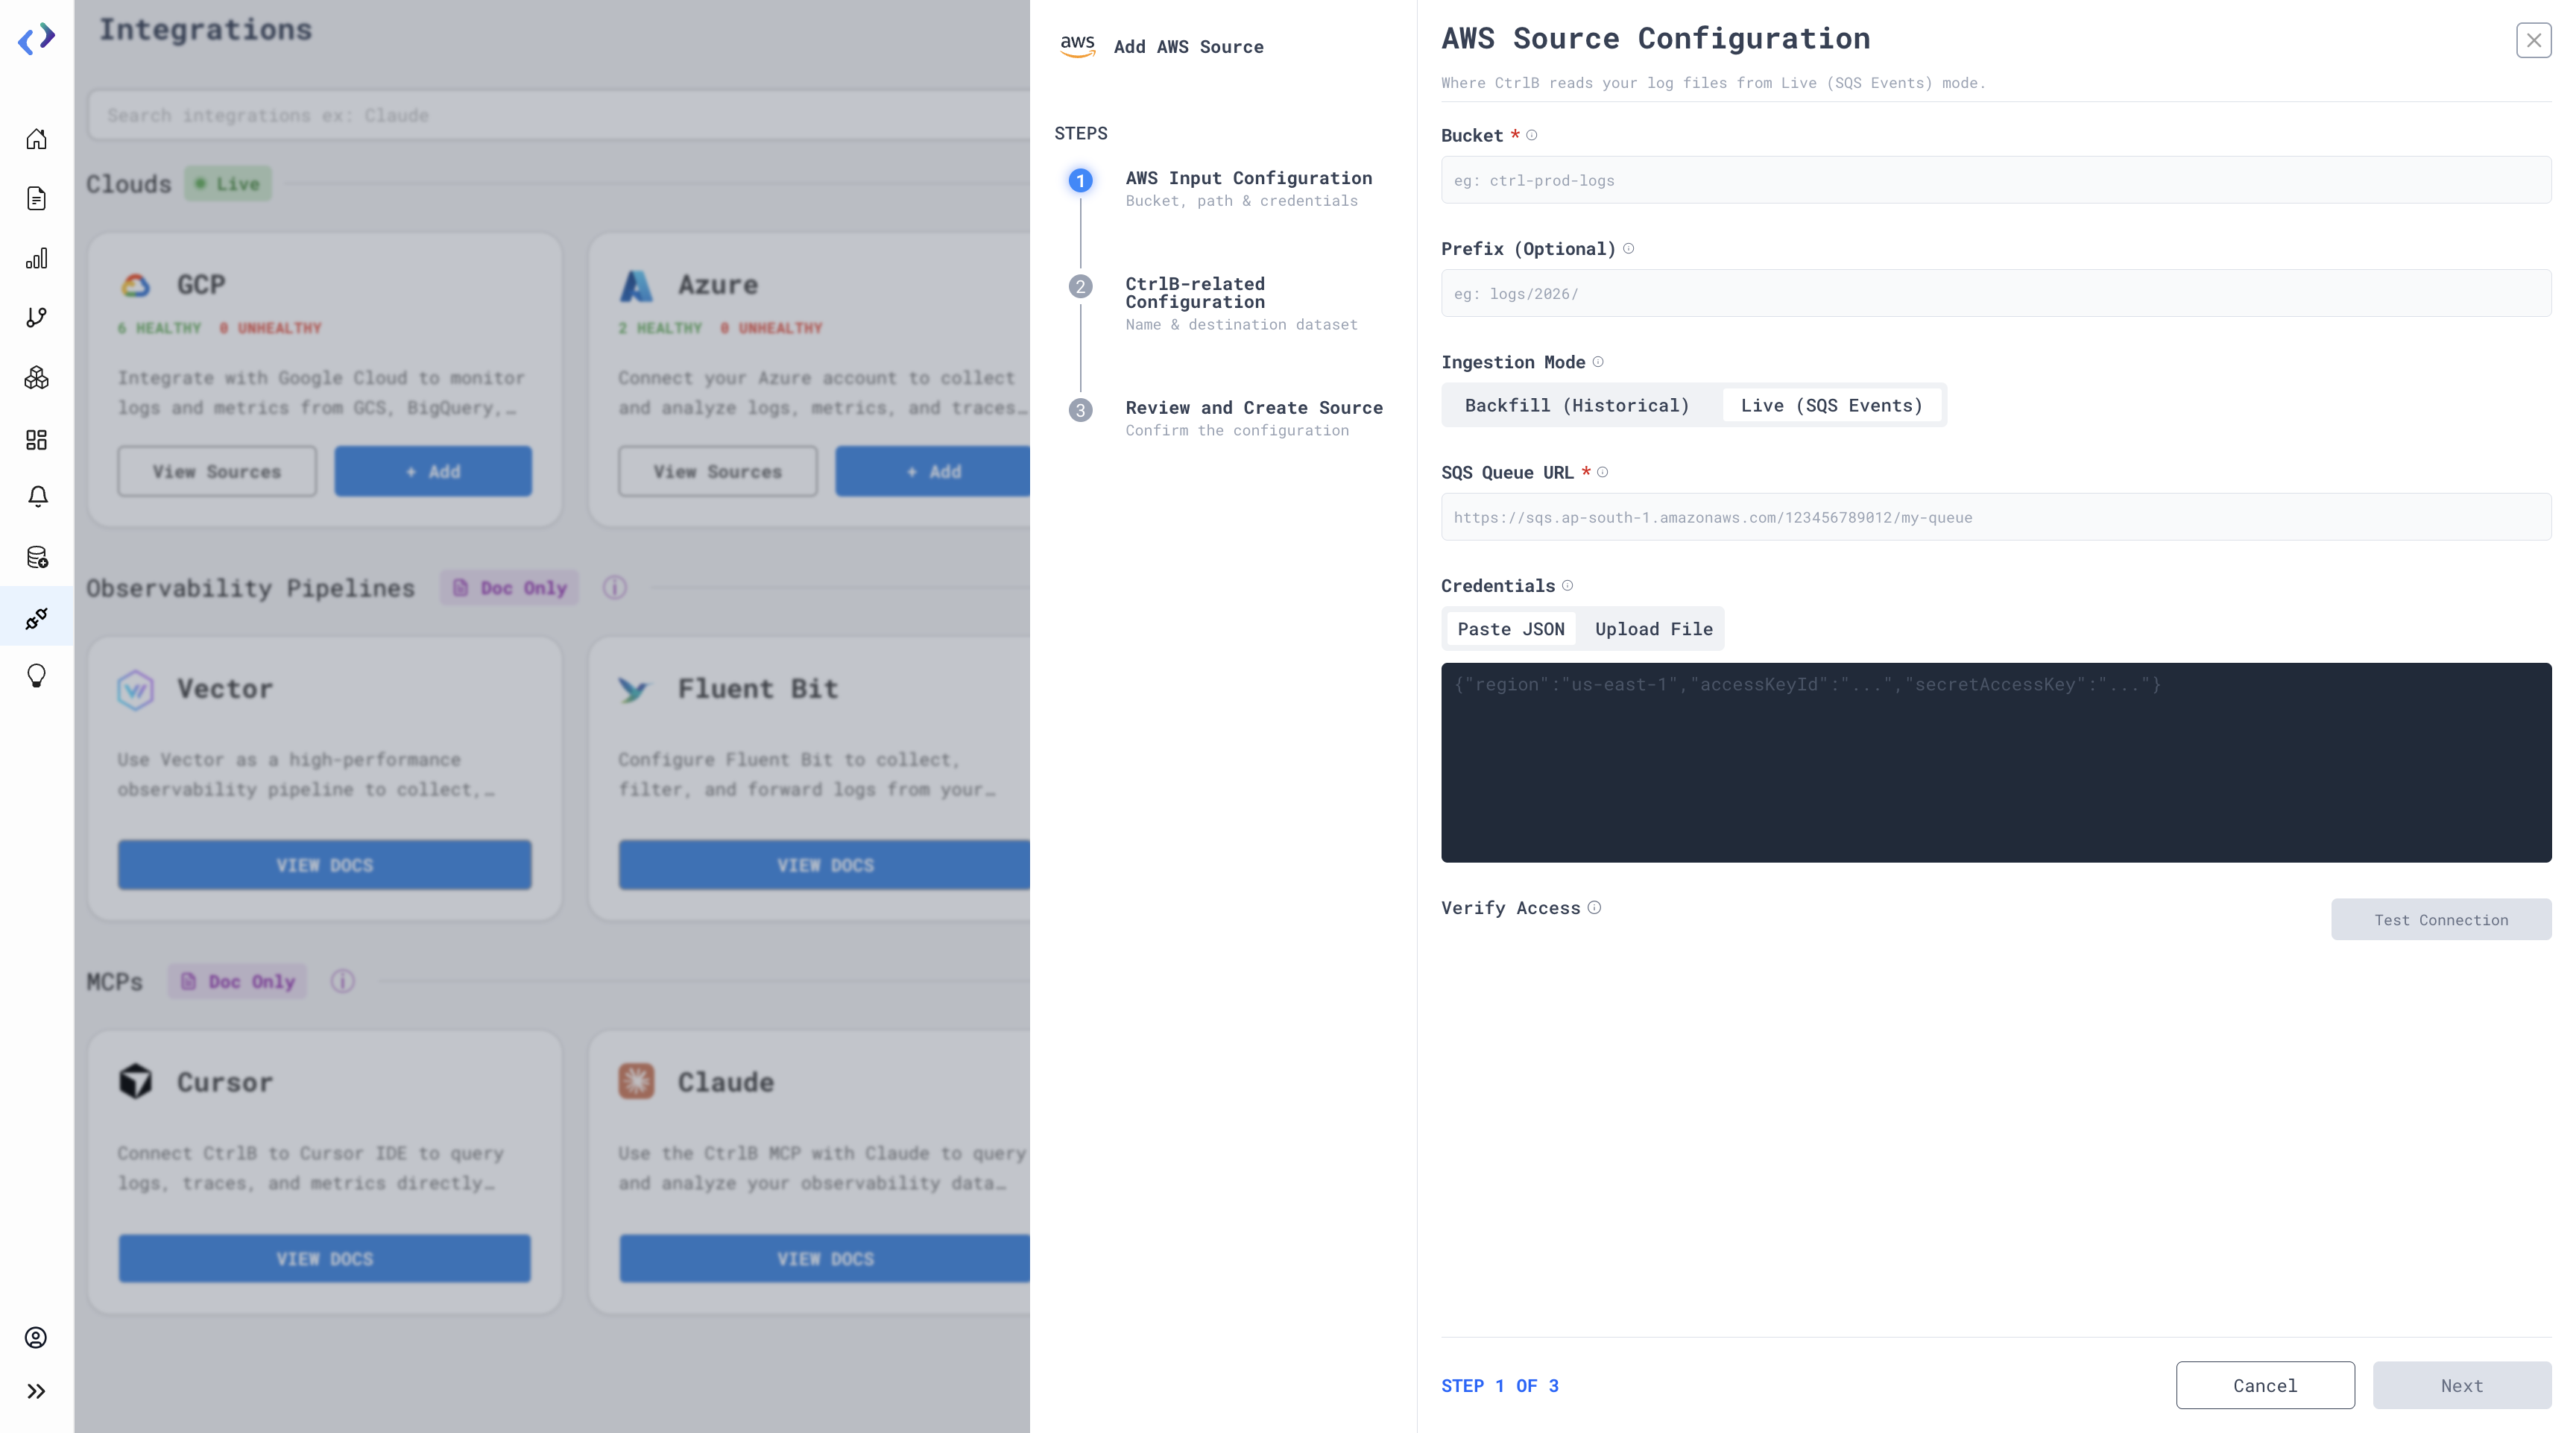
2. Live Blob Uploader
Live Blob Uploader allows users to ingest newly uploaded files in real time using SQS Events. Currently, Live Blob Uploader is available only for AWS node. Users can configure the S3 bucket, SQS queue, AWS credentials, and destination dataset while creating the source.
How to Use It:
-
Go to the Integrations page.
-
Under Clouds, select AWS and click Add.
-
Enter the Bucket name and an optional Prefix.
-
Select Live (SQS Events) under Ingestion Mode.
-
Enter the SQS Queue URL.
-
Provide AWS credentials by either pasting the JSON or uploading a credentials file.
-
Click Test Connection to verify the connection.
-
Click Next.
-
Enter a Source Display Name and select the destination Dataset.
-
Click Next.
-
Review the source and CtrlB-related configuration.
-
Click Create Source to complete the setup.
Note:
Ensure the AWS credentials have the required permissions to access the configured S3 bucket and SQS queue.
Availability:
Available for users with permission to configure integrations.